You’ve turned the pile, waited, and now there’s a bin full of dark, crumbly material that looks nothing like the kitchen scraps you started with. The frustrating part is that finished compost is easy to ruin at the finish line: spread it too thick, use it too early, or till it in at the wrong depth, and the plants that were supposed to thrive can stall instead. If you’re still producing compost rather than using it, it’s worth confirming your equipment is doing its job check out this review of a dual-chamber tumbler to see whether your batch is getting the aeration it needs. Once the compost is genuinely ready, the way you apply it matters as much as how you made it.
Quick Answer
Use finished compost as a soil amendment, not as a replacement for soil. Work 1–2 inches into the top 6–8 inches of an established bed before planting, or spread a thinner ¼–½ inch layer as a top dressing during the season. For containers, keep compost to roughly 20–30 percent of the mix by volume. Only apply compost that is fully cured — cool, earthy-smelling, and crumbly — because immature compost can tie up nitrogen and damage young roots.
Key Takeaways
- Finished compost should be cool, earthy-smelling, and crumbly, with no recognizable food scraps; if it still heats up or smells sour, it needs more curing time.
- Application rates vary by situation: 2–4 inches for poor native soil, 1–2 inches for established beds, and much less for containers and mid-season top dressing.
- Compost works as a slow-release nutrient source and soil conditioner, but it is not a complete fertilizer — heavy feeders may still need supplemental feeding.
- Root crops and seedlings are the most sensitive to immature or manure-heavy compost, which can cause forking, burning, or stalled growth.
- Timing matters: applying compost in fall gives it months to integrate, while spring applications should go in at least two to three weeks before planting.
How to Tell Your Compost Is Actually Finished
Before anything goes on the garden, confirm the batch is cured. Compost that looks done but is still biologically active can do real damage — it competes with plants for nitrogen and can harbor pathogens that haven’t been killed off.
Five quick readiness checks
- Temperature: A finished pile sits at or near ambient temperature. If the center is still warm, microbes are still working and the material isn’t stable yet.
- Smell: It should smell like forest floor or damp earth. Sour, ammonia-like, or rotten odors mean incomplete decomposition.
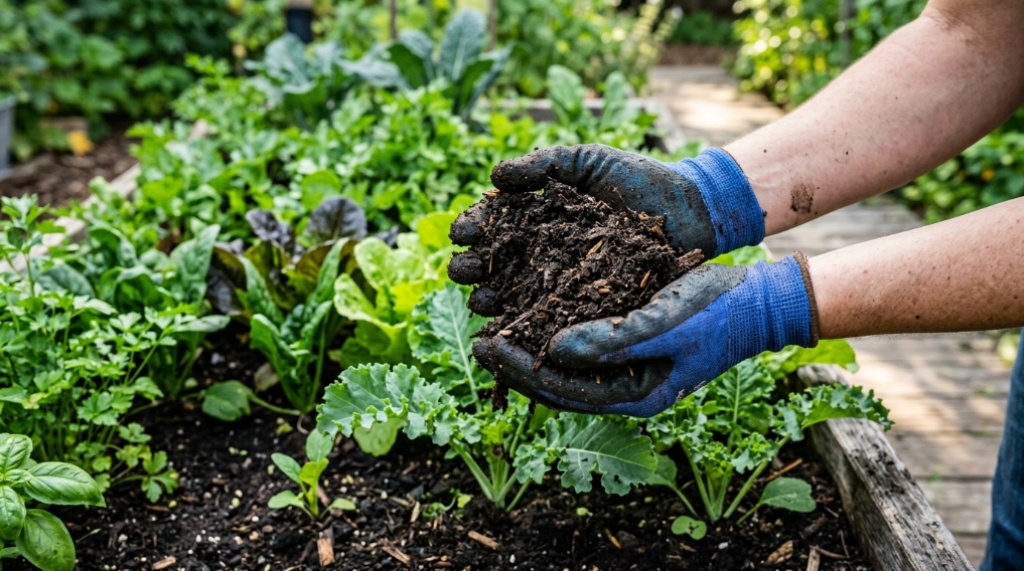
- Texture: Squeeze a handful. It should feel crumbly and moist like a wrung-out sponge, not slimy or sticky.
- Appearance: No recognizable food scraps, eggshell fragments aside. Original ingredients should be mostly indistinguishable.
- Seed germination test: Fill two small pots — one with your compost, one with a known good potting mix — and sow fast-germinating seeds like radish or lettuce in each. If the compost pot germinates poorly or the seedlings yellow and stall, the compost isn’t ready.
If a batch fails these checks, spread it out in a thin layer, keep it moist, and turn it every week or two. Curing typically takes another three to eight weeks depending on pile size and weather.
How Much Compost to Apply
More compost is not better. Excessively thick layers can create a matted surface that repels water, and repeated over-application builds up phosphorus and soluble salts over years. Match the rate to the situation.
| Situation | Typical rate | How to apply |
|---|---|---|
| New bed or poor native soil | 2–4 inches | Work into the top 6–8 inches with a fork or tiller |
| Established vegetable bed | 1–2 inches annually | Spread on the surface and scratch in, or leave as mulch |
| Mid-season top dressing | ¼–½ inch | Scatter around plants, keep clear of stems |
| Raised bed refresh | 1–2 inches | Mix into the top few inches before replanting |
| Containers | 20–30% of mix by volume | Blend with potting mix, not garden soil |
| Transplant holes | A handful per hole | Mix with backfill soil before setting the plant |
These are general ranges. Sandy soils that drain fast and leach nutrients benefit from the higher end; heavy clay benefits more from repeated moderate applications than one massive dose, because organic matter improves clay structure gradually.
Six Ways to Use Finished Compost in the Garden
Compost is versatile, but each method suits a different goal. Choose based on whether you want to feed plants now, build soil long-term, or protect the surface.
1. Incorporate it before planting
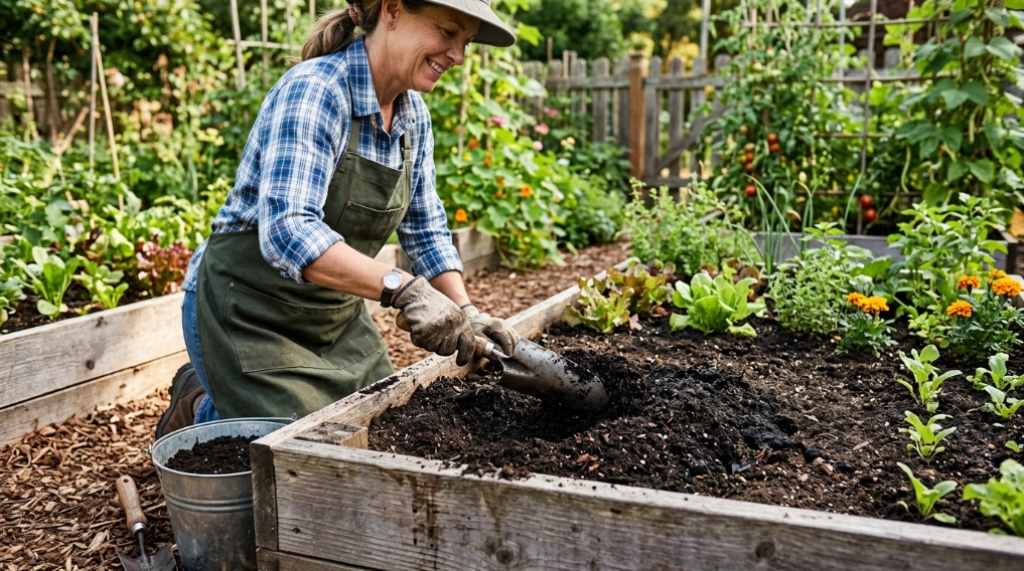
This is the standard approach for bed preparation. Spread compost over the bed and mix it into the top 6–8 inches. Mixing puts organic matter and nutrients where roots will actually reach them, and it improves both water retention in sand and drainage in clay.
2. Top dress around growing plants
A thin layer of compost around established plants feeds the soil food web slowly and suppresses surface crusting. Keep it an inch or two away from stems and crowns to avoid rot, especially on tomatoes, peppers, and squash.
3. Side dress heavy feeders
For crops like tomatoes, corn, and brassicas, a band of compost along the row at mid-season provides a gentle nutrient boost without the burn risk of concentrated synthetic fertilizers. It’s slower-acting, so apply it before plants show obvious deficiency, not after.
4. Use it as mulch
Fully finished compost makes an excellent mulch at 1–2 inches deep. It holds moisture, moderates soil temperature, and gradually works its way down via earthworm activity. Immature compost should never be used this way — it can mat, smell, and attract pests.
5. Blend it into container mixes
Compost adds biology and water-holding capacity to potting mixes, but too much makes containers heavy and can compact. Keep it to roughly a quarter of the total volume and pair it with a lightweight potting mix rather than garden soil.
6. Brew compost tea — with realistic expectations
Compost tea can inoculate leaf surfaces and soil with beneficial microbes, but it is not a fertilizer and its nutrient content is low. Use it as a supplement, not a replacement for compost applications, and use it within a few hours of brewing since microbial populations decline quickly.
When to Apply Compost for the Best Results
Fall is the best time to apply compost to vegetable beds. Soil is still warm enough for microbial activity, winter freezing and thawing helps incorporate it, and the material has months to mellow before spring planting. There’s also no risk of interfering with germination.
Spring applications work fine, but timing matters: apply at least two to three weeks before sowing or transplanting so the compost can settle and any residual biological activity can stabilize. Applying fresh compost the same day you plant is a common cause of poor germination and yellowed seedlings.
Mid-season top dressing is best done after a rain or watering, when the soil surface is moist, and followed by a light watering to settle the material.
Which Crops Respond Best — and Which Are Picky
Heavy feeders show the clearest response: tomatoes, peppers, eggplant, corn, brassicas, cucumbers, and squash all benefit from compost-rich soil. Leafy greens like lettuce and spinach also respond well because compost supports steady, even moisture.
Root crops are the exception worth noting. Carrots, parsnips, and beets grown in soil with too much fresh or partially decomposed organic matter tend to fork, split, and develop hairy roots. If you’re growing root crops, use well-cured compost applied the previous season rather than right before sowing.
Legumes are another group that needs less. Beans and peas fix their own nitrogen, so heavy compost applications mostly just build soil organic matter rather than feeding the plants, Before adding nutrients to your beds, make sure you have the right equipment ready by checking out our guide on how to compare transplanter tools for texas gardens.
Common Mistakes That Waste Good Compost
- Using it before it’s cured. Warm, smelly, or chunky compost is still composting, and it will compete with your plants.
- Applying it too thick. Layers over 3–4 inches can seal the soil surface and reduce oxygen exchange.
- Treating it as fertilizer. Compost is typically low in nitrogen relative to synthetic fertilizers. Heavy feeders usually need more than compost alone.
- Ignoring herbicide residue. Compost made from grass clippings or manure treated with persistent herbicides like aminopyralid can damage tomatoes, peppers, and legumes for years. If you source manure or hay from off-site, run a bioassay by growing a few bean seedlings in a sample before spreading it widely.
- Leaving it in an uncovered pile for months. Nutrients leach out with rain. Cover the pile or use it within a season.
Frequently Asked Questions
Can I plant directly into finished compost?
Generally no. Finished compost is a soil amendment, not a growing medium. It tends to be dense, holds too much water in containers, and lacks the mineral structure roots need. Blend it with soil or potting mix instead — usually no more than 20–30 percent by volume for containers.
Does compost replace fertilizer?
Not entirely. Compost supplies nutrients slowly and improves soil structure, but its nutrient concentration is low compared with fertilizers. Heavy-feeding crops often need supplemental feeding even in compost-rich beds. Think of compost as building the soil’s capacity to feed plants over time.
How long does finished compost stay good?
Stored in a covered pile or bin and kept moist but not soggy, finished compost remains usable for many months. Nutrient content declines slowly through leaching and microbial activity. If it dries out completely, re-moisten before applying so it doesn’t repel water on the bed surface.
Can I use compost that still has worms and bugs in it?
Yes. Earthworms, springtails, and beneficial insects in finished compost are a sign of a healthy, biologically active product. They won’t harm your garden. The exception is if you see large numbers of pest larvae or the material still smells sour — that suggests it needs more curing.
Should I screen my compost before using it?
Screening is optional but helpful. Running compost through a half-inch screen removes sticks, stones, and undecomposed chunks, producing a finer material that’s easier to spread and better suited to seed starting or container blends. Unscreened compost works fine as mulch or incorporated into beds.
Is compost safe for seedlings?
Only fully cured compost, and only in modest amounts. Immature compost can burn tender roots or cause damping-off. For seed starting, many gardeners use a mix that’s mostly peat or coir with just a small proportion of finished compost, or skip compost entirely until seedlings are potted up.
Conclusion
Finished compost is one of the most valuable things you can add to a vegetable garden, but it rewards restraint and timing. Confirm the batch is genuinely cured, match the application rate to whether you’re building new soil or maintaining an established bed, and apply it in fall when possible. Keep it away from direct contact with stems, use less on root crops, and don’t expect it to replace fertilizer entirely. Get those basics right and a single bin of compost can improve your soil for several seasons.