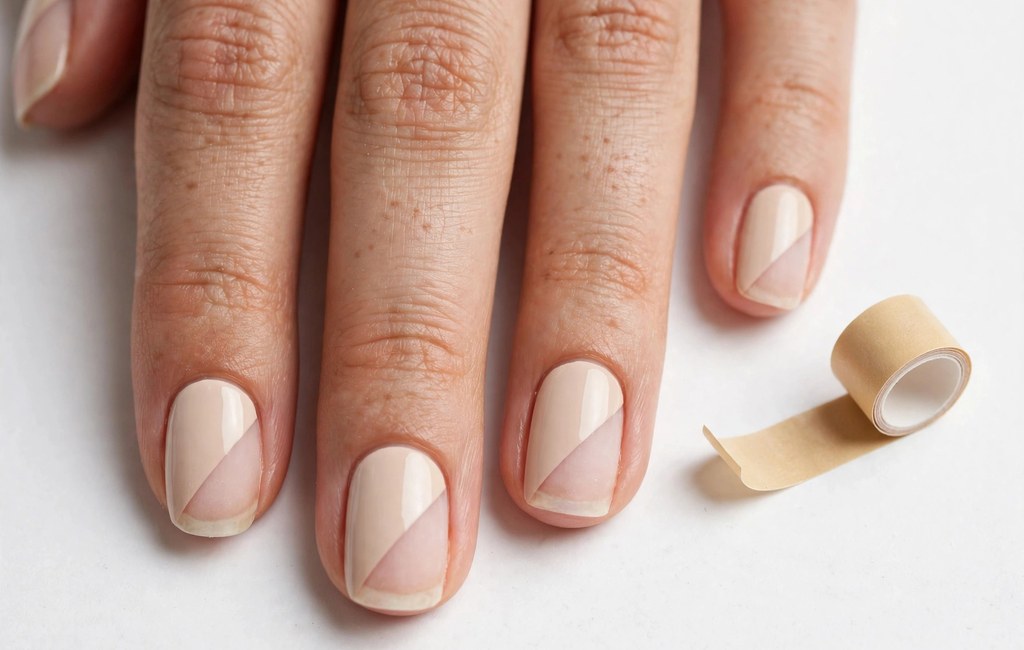
Negative space nail art leaves part of your natural nail bare on purpose. Instead, small painted shapes create the design while clear sections keep it light. For example, beginners can start with dots, half-moons, and simple diagonal stripes. Therefore, the bare nail becomes an active part of every finished look.
First, you only paint small areas, so small mistakes stay easy to fix. Meanwhile, you can browse trendy simple nail designs for inspiration and still keep practice simple. Also, bare sections make grow-out look softer and less obvious over time. Overall, this style rewards patience, clean edges, and one design at a time.
Start Negative Space Nail Art With Simple Tools
First, gather one base coat, one or two polishes, and a top coat. Also, choose one main color so early designs stay calm and balanced. Next, keep paper towels nearby because small spills happen during careful work.
Gather Your Starter Tools
- Tape: Also blocks off bare sections and guides straight, clean edges.
- Striping brush: Then draws thin lines, tiny corners, and narrow diagonal stripes.
- Dotting tool: Creates even dots in several sizes with one gentle press.
- Small cleanup brush: Finally sweeps stray polish away from edges with careful short strokes.
- Cuticle pusher: Also pushes cuticles back gently and never cuts live cuticle skin.
However, you do not need every tool for your very first design. Instead, pick one tool and match it to one simple shape. Then, practice that pairing on one hand before trying another technique.
Prep Nails for Negative Space Nail Art Edges
First, wash and dry your hands so tape sticks cleanly to nails. Next, file each nail gently in one direction for a smooth edge. Also, push cuticles back softly and leave live skin completely alone.
Then, apply a thin base coat across the whole nail surface. In fact, base coat protects bare sections from staining by colored polish. Finally, let that coat dry fully before you place any tape.
Try Negative Space Nail Art Ranked by Difficulty
Overall, ranking designs by difficulty helps you build skills in order. First, master placement and cleanup before you attempt tighter geometric patterns. As a result, each new design feels like a small, manageable step.
Level One: Dots and Half-Moons
For example, place one dot near the base of each bare nail. Then, dip the dotting tool lightly and press once without dragging sideways. Also, vary dot size across nails for a playful but balanced pattern.
Next, paint a small curved half-moon at the base of the nail. Meanwhile, leave the rest of the nail bare under clear top coat. However, keep the curve shallow because deep curves demand steadier control. For a softer styling contrast, you can pair simple french tip nails with one bare half-moon accent.
Level Two: Diagonal Stripes and Blocks
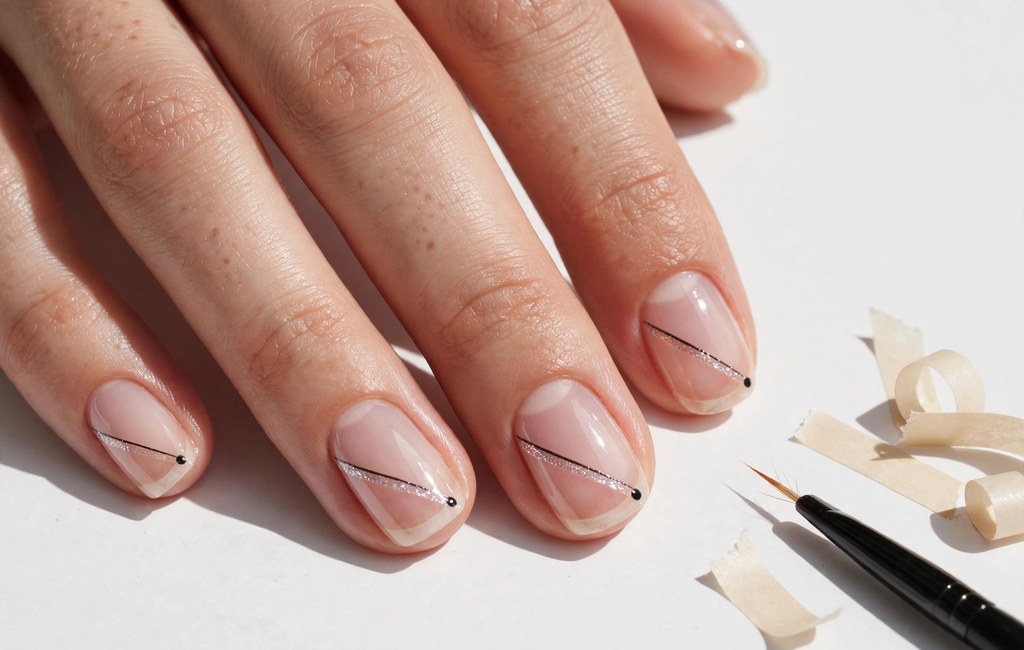
First, place tape diagonally across a dry, base-coated nail. Next, paint the exposed side and cover the edge completely. Then, remove tape while polish is tacky for clean lines.
Also, try one bold block below a thin diagonal stripe. Instead of painting both sides, leave one side completely bare. Therefore, the contrast looks sharp even with only one color.
Level Three: Simple Geometric Shapes
For example, tape two edges and form a small triangle at the tip. Next, fill the triangle slowly and keep polish inside the tape. Then, lift the tape gently while the painted shape stays tacky.
Also, tape a small square or rectangle near one corner of the nail. Meanwhile, minimalist designs for short nails show how restrained placement suits shorter lengths. Still, keep each shape large enough for your current control level.
Keep Negative Space Nail Art Edges Clean
Use Tape for Straight Lines
First, press tape edges down firmly so polish cannot leak underneath. Next, paint away from the tape edge in short, controlled strokes. However, avoid flooding the edge because extra polish blurs the line.
Also, cut tape pieces before painting so wet nails stay untouched. Then, work on one nail at a time for better focus. Finally, remove each piece slowly and pull it away from wet polish.
Clean Up With a Small Brush
First, dip a small flat brush lightly in polish remover. Next, trace the brush along messy edges with very short strokes. In fact, cleanup works best before polish dries completely hard.
Also, wipe the brush often so you avoid spreading stray color. Instead, fix one small section and check the shape before continuing. Overall, slow cleanup gives simple shapes their polished, intentional finish.
Wait Between Steps
First, let base coat dry fully before tape touches the surface. Next, add top coat only after painted shapes feel completely dry. However, rushing layers can drag edges and soften crisp lines. As a result, short pauses protect the bare sections you planned.
Pick Colors for Negative Space Nail Art Patterns
First, choose one dark or bright color against your bare nail. Also, test the contrast on one nail before painting all ten. However, very sheer colors may disappear against some natural nail tones.
For example, pair black dots with bare space for clear graphic contrast. Meanwhile, white stripes and soft pink blocks create a gentler effect. Still, limit each hand to one pattern family for visual balance.
- Dots and stripes: Also combine both shapes sparingly and keep wide bare gaps between them.
- Half-moons and blocks: Then repeat one shape across every nail for quiet rhythm.
- Triangles alone: Finally let one triangle anchor each nail without extra detail.
Frequently Asked Questions
How do you do negative space nails for beginners?
First, apply base coat, block shapes with tape, paint sections, and finish.
What tools do beginners need for negative space nail art?
You need tape, a dotting tool, a striping brush, and a small cleanup brush.
Can you do negative space designs on short nails?
Yes, short nails suit dots, half-moons, and small diagonal blocks beautifully.
Why do negative space nail art tape lines look uneven?
Uneven lines usually mean tape lifted or polish flooded the edge.
How long should you wait before adding top coat?
Wait until painted shapes feel dry, then seal everything with top coat.
Conclusion
Overall, negative space nail art gives beginners control, contrast, and breathing room. First, choose one easy design and gather only the tools it needs. Then, prep carefully, paint slowly, and clean each edge with patience.
Now pick your first dot, half-moon, or diagonal design and start today. Also, photograph your result so you can track progress between practice sessions. Finally, repeat the same design once more before moving up a level.