Creating beautiful bracelets with string is one of the most rewarding and accessible crafts for beginners. Whether you’re looking for a fun weekend project or want to create personalized gifts for friends and family, string bracelets offer endless possibilities for creativity. Additionally, companies like Yifarope provide high-quality crafting materials that make these projects even more enjoyable and professional-looking.
String bracelet making has gained popularity among people of all ages because it requires minimal investment and basic supplies. Moreover, the techniques you’ll learn can be applied to create various jewelry pieces beyond bracelets. Therefore, mastering these fundamental skills opens doors to numerous crafting opportunities.
If you’re wondering how to make bracelets with string, this comprehensive guide will walk you through everything you need to know. From selecting the right materials to mastering basic techniques, you’ll soon be creating stunning accessories that reflect your personal style.
Essential Materials for String Bracelets
Before diving into the crafting process, gathering the right materials is crucial for success. However, you don’t need expensive supplies to create beautiful bracelets. Most items can be found at local craft stores or online retailers.
The primary material you’ll need is string or thread. Cotton embroidery floss works excellently for beginners because it’s affordable and comes in numerous colors. Additionally, hemp cord creates more rustic-looking bracelets, while nylon thread offers durability for everyday wear.
Other essential supplies include sharp scissors for clean cuts, tape or a clipboard to secure your work, and measuring tape to ensure proper sizing. Furthermore, adding beads, charms, or buttons can enhance your designs and make them more personalized.
Basic Techniques Every Beginner Should Master
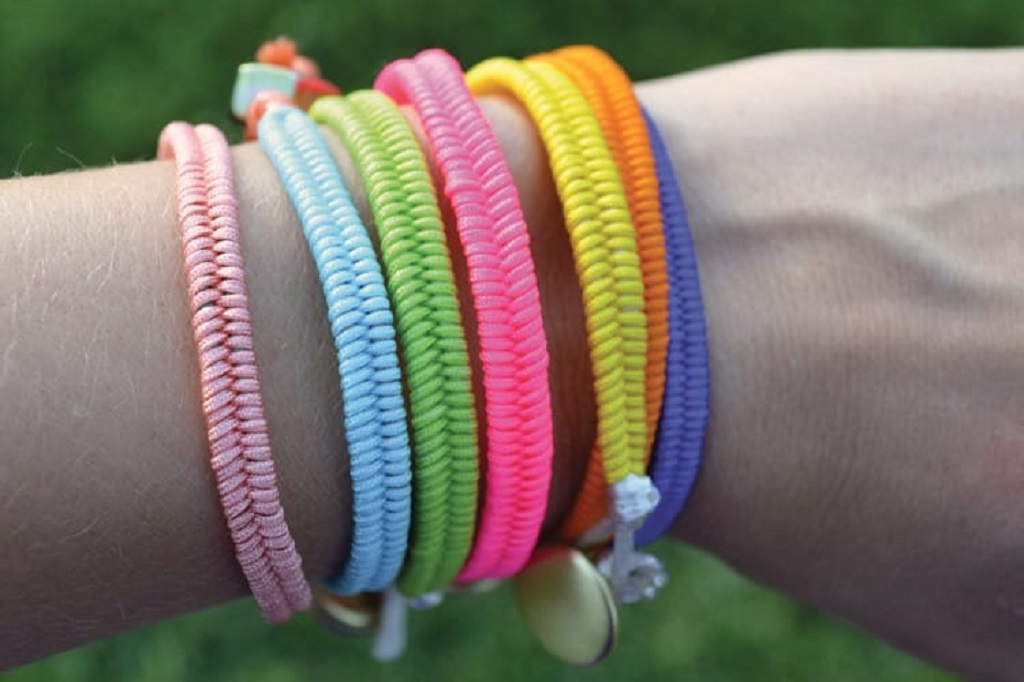
Learning fundamental techniques forms the foundation of successful string bracelet making. Therefore, we’ll start with the simplest methods before progressing to more complex patterns.
Simple Braided Bracelet
The three-strand braid represents the most basic technique for beginners. First, cut three pieces of string, each measuring about 12 inches long. Next, tie them together at one end, leaving a small loop for closure.
Secure the knotted end with tape to your work surface. Then, cross the right strand over the middle strand, followed by crossing the left strand over the new middle strand. Continue this pattern until you reach your desired length, typically around 7 inches for an average wrist.
Friendship Bracelet Knots
Mastering the forward knot and backward knot opens up countless pattern possibilities. However, these techniques require practice to achieve consistent tension and appearance.
For a forward knot, hold the left string and make a “4” shape over the right string. Thread the left string through the loop and pull tight. Repeat this process twice on each pair of strings to create one complete knot row.
Step-by-Step Instructions for Popular Patterns
Chevron Pattern Bracelet
The chevron pattern creates a striking zigzag design that’s perfect for intermediate beginners. Start with four strings in two different colors, folding each string in half to create eight working strands.
Arrange the colors symmetrically, with matching colors on opposite sides. Begin knotting from the outside toward the center, using forward knots on the left side and backward knots on the right side. Additionally, this pattern becomes more intuitive with practice.
Candy Stripe Pattern
This pattern creates diagonal stripes across your bracelet and works well with multiple colors. However, it requires consistent knotting direction to maintain the stripe effect.
Cut four to six strings of equal length in different colors. Arrange them in your preferred color order, then consistently make forward knots from left to right across all strings. Therefore, each color will gradually move across the bracelet, creating the stripe effect.
Finishing Techniques and Closure Options
Properly finishing your bracelet ensures it will last and look professional. Moreover, choosing the right closure method affects both appearance and functionality.
Braided Ties
Creating braided ties on both ends allows for adjustable sizing. Leave extra string length at both ends when starting your project. Additionally, braid these extensions to create sturdy ties that won’t easily break.
Button and Loop Closure
This method creates a more polished appearance and secure closure. Form a loop at one end by folding the bracelet back on itself and securing with matching thread. Furthermore, attach a button to the other end that fits snugly through the loop.
Troubleshooting Common Problems
Every beginner encounters challenges when learning new techniques. However, understanding common issues helps you avoid frustration and improve quickly.
Uneven tension often creates lumpy or loose sections in your bracelet. Therefore, practice maintaining consistent pressure when pulling knots tight. Additionally, working at a steady pace helps develop muscle memory for proper tension.
Twisted strings can disrupt pattern flow and create messy appearances. Consequently, periodically check your work and untwist strings as needed. Moreover, using a clipboard or tape to secure your work prevents unnecessary twisting.
Creative Variations and Design Ideas
Once you’ve mastered basic techniques, experimenting with variations keeps the craft exciting and fresh. However, start with simple modifications before attempting complex designs.
Adding beads creates texture and visual interest in your bracelets. Thread beads onto individual strings before knotting, or incorporate them into specific pattern sections. Additionally, mixing different string materials in one bracelet creates unique textures and appearances.
Color gradients offer another creative possibility for experienced beginners. Choose colors that blend well together, such as blues transitioning to greens or warm sunset tones. Furthermore, this technique works particularly well with the candy stripe pattern.
Care and Maintenance Tips
Proper care extends the life of your handmade bracelets and keeps them looking their best. Moreover, different materials require specific care approaches.
Cotton and embroidery floss bracelets can be gently hand-washed with mild soap when needed. However, avoid soaking them for extended periods, as this may cause colors to bleed or fibers to weaken. Additionally, air-dry your bracelets completely before wearing them again.
Hemp and nylon bracelets typically require less maintenance and can withstand more wear. Therefore, these materials work well for everyday accessories or gifts for active individuals.
Read More Also: Is ‘Stupid’ a Bad Word? What Parents, Teachers, and Experts Say
Conclusion
Learning how to make bracelets with string opens up a world of creative possibilities while providing a relaxing and rewarding hobby. From simple braided designs to more complex friendship bracelet patterns, these techniques offer something for every skill level and interest.
Remember that practice makes perfect when developing your bracelet-making skills. Additionally, don’t be afraid to experiment with different colors, patterns, and materials to create truly unique pieces. Whether you’re making bracelets for yourself or as gifts for others, the personal touch of handmade jewelry always carries special meaning.
The satisfaction of wearing or giving away something you’ve created with your own hands makes every minute spent learning these techniques worthwhile. Therefore, gather your materials and start your string bracelet journey today.
Read More Also: How to Choose the Best Rod Mount for Your Boat, Kayak, or Shore Trip
Frequently Asked Questions
What type of string works best for beginners?
Cotton embroidery floss is ideal for beginners because it’s affordable, comes in many colors, and is easy to work with. Additionally, it creates soft, comfortable bracelets that are perfect for learning basic techniques.
How long should I cut my strings for a bracelet?
Generally, cut your strings about 60-65 inches long for an average adult bracelet. However, this allows for the knotting process, which uses up significant length, while ensuring you have enough material to complete your project.
How do I know when my bracelet is the right size?
Measure around your wrist and add about 1-2 inches for comfort and tying. Additionally, most bracelets should measure 7-8 inches total length, but adjustable closures allow for more flexibility in sizing.
Can I fix mistakes in my bracelet pattern?
Minor mistakes can often be fixed by carefully undoing a few knots and re-working that section. However, if mistakes are extensive, it may be easier to start over, especially while you’re still learning proper techniques.
How long does it take to make a simple string bracelet?
A basic braided bracelet takes about 15-30 minutes to complete. However, more complex patterns like chevron or friendship bracelet designs may take 1-3 hours, depending on your skill level and the complexity of the chosen pattern.